I recently finished a project where I needed to figure out how long ago a blog post was submitted. I was using javascript and had the date that the post was submitted as a string that looked like this:
1
var datePublished = "2016-05-09 11:03:00"
In order to be able to make calculation the first thing I did was changed the datePublished variable from a string into milliseconds. Date.parse returns the number of milliseconds since January 1, 1970. Initially this seemed straightforward. I used Date.parse like this:
1
Date.parse(datePublished)
Once I had the millisecond value I could find the difference between that number and the millisecond value of the current time. This was working great when I checked out the site on Chrome BUT when I went to look at the site in Safari I saw a big NaN where the time difference should be.
It turns out that Safari does not support Date.parse(). What should I do?
I searched around the web and found a cool javascript library called Moment.js. Moment.js lets you parse, manipulate and display dates. It turns strings with date information into moment object which you can then act on. I created a moment object by doing this ‘moment(publishedDate)’. Once I had the date as a moment object I could turn it into millisecond by calling a valueOf() method that is part of moment.js library.
Here’s the code:
12
var datePublished = "2016-05-09 11:03:00"
publishedTime = moment(publishDate).valueOf();
publishedTime now has the milliseconds of the date since January 1, 1970! It’s a number that I can subtract from other numbers to find the time difference. Problem solved. Amazing.
While working on my latest project I came across SweetAlert for Bootstrap. Sweetalert is a simple to use
alert tool in javascript. Instead of writing ‘alert’ and get the browser’s standard messaging Sweetalert creates a nicely styled alert box that even has the options for
several nice success and alert graphics.
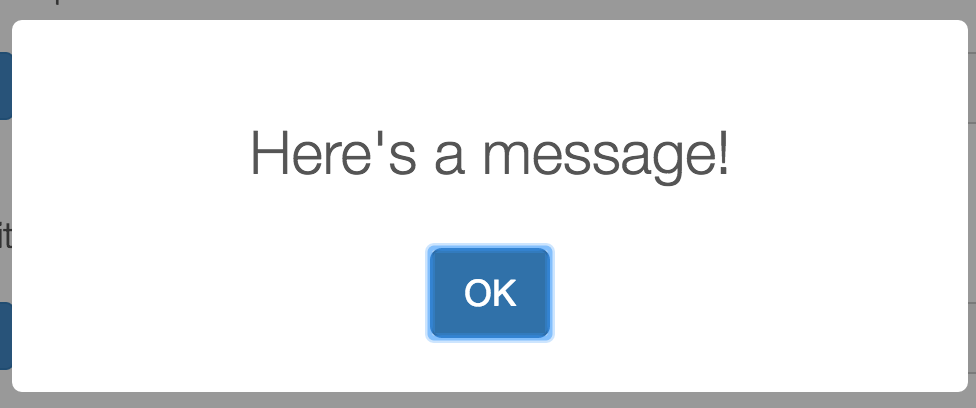
Here’s how to use it. Just add the following to your javascript.
1
swal("Here's a message!")
This would produce this message:
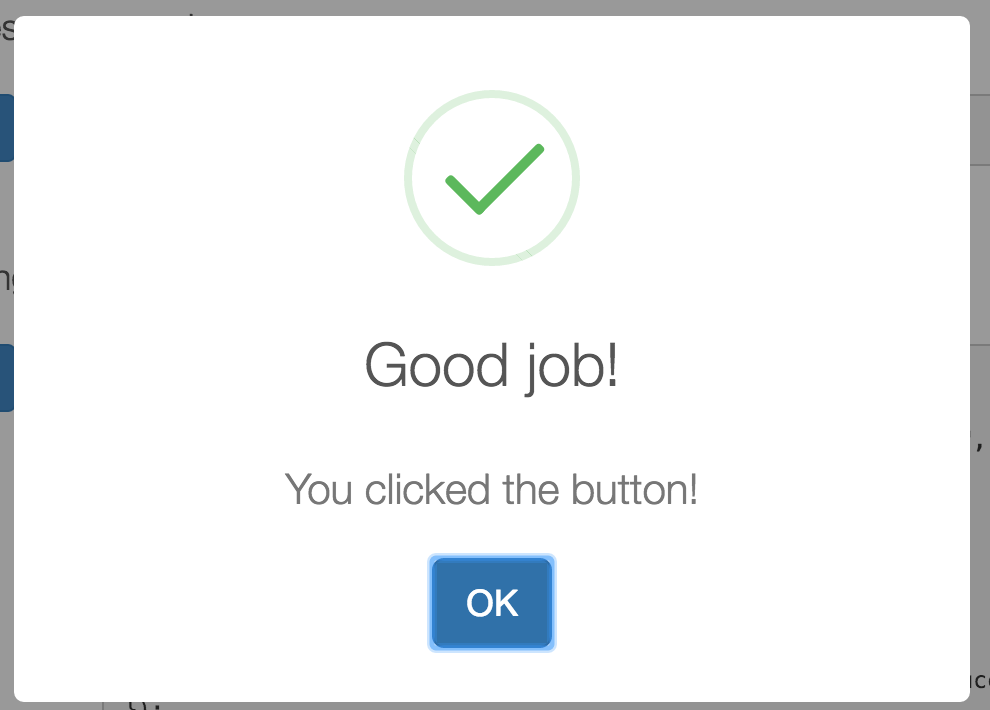
Sweetalert also has easy to create success confirmation.
1
swal("Good job!", "You clicked the button!", "success")
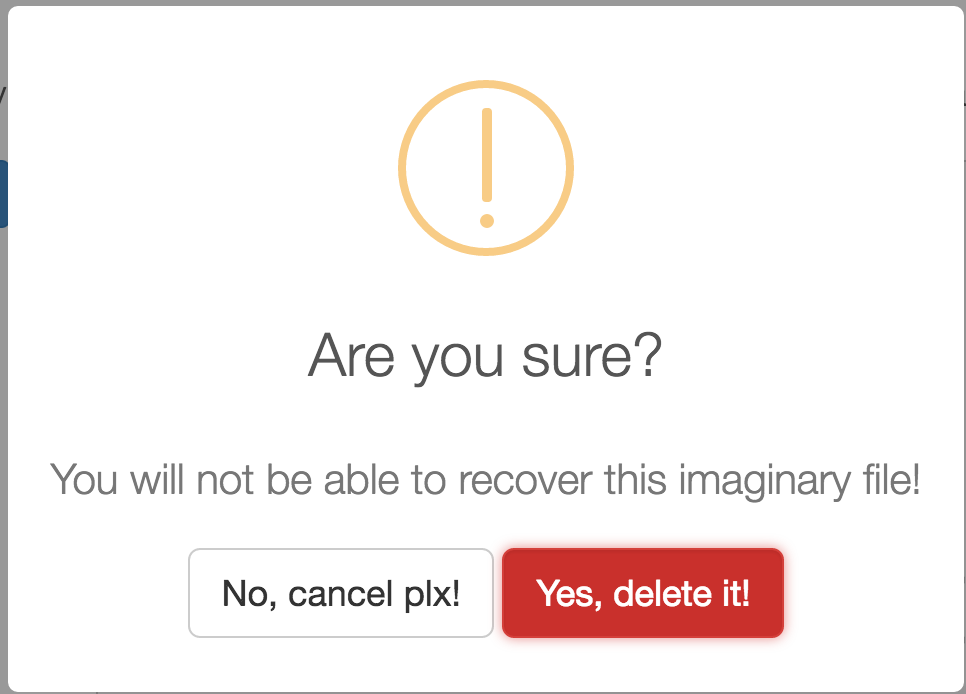
There’s also option for a confirmation alert box:
123456789101112
swal({
  title: "Are you sure?",
  text: "Your will not be able to recover this imaginary file!",
  type: "warning",
  showCancelButton: true,
  confirmButtonClass: "btn-danger",
  confirmButtonText: "Yes, delete it!",
  closeOnConfirm: false
},
function(){
  swal("Deleted!", "Your imaginary file has been deleted.", "success");
});
Sweetalert is simple and easy to use but their are other alert tools in javascript that may be helpful for your next projects. Here are a few more:
jQuery Toastmessage - This JQuery plugin provides android-like notification messages. The toasted messages arrive on the screen in a seamless and natural way.
Notify - jQuery plugin which adds simple notifications bars that you can use on your website and application to assist users while they fill in forms, navigate through pages or interact with interface.
Sticky - A super simple notification system for jQuery
I spent most of last weekend trying to get Oauth to work with with a javascript application.
I learned a lot about what oauth is, why it is ‘potentially helpful,’ and, most importantly, when not to use it.
Oauth is required by a number of popular web platforms in order to interact with their API.
I was trying to use the Twitter API which requires oauth authentication before
Twitter will share or accept any information. Ruby makes it really simple to setup this
authentication using a gem but since I had a single page javascript site I tried to set up
oauth authentication with an ajax call. This was a mistake which I will explain in more depth later.
What is OAuth?
Let’s take a step back and try to understand what Oauth is and why so many APIs require it.
Twitter defines it like this, “OAuth is an authentication protocol that allows users to approve application
to act on their behalf without sharing their password.” OAuth creates a way for users to
grant third-party access to their resources
without the need to share their passwords. It also provides a way to grant access in a more limited way
like duration and scope.
Think of oauth as a fancy way to authenticate. It allows one service to gain access to a user’s
restricted content from another service without needing to receive the user’s username or password
from the original service. For example, what if you want catfinder.com to automatically post to your Twitter account
every time a new cat shows up in your neighborhood. Catfinder will go through Twitter to
ask you (the user) permission to be allowed to post to your twitter account.
Today there are lots of different cloud services with various logins like Facebook, Gmail, and Twitter . Asking users to have unique
password for every single service will actually reduce the level of security since people will
just start using very simple password like 1,2,3,4 or the same password. It’s simpler if a user
can have a unique username and password with Twitter. Oauth lets a user leverage the username and password they
have to gain access to other services.
Here’s the basic user flow that a user sees:
The user wants catfinder.com to automatically post to their twitter account. Catfinder says, let me go ask twitter.
Catfinder reaches out to twitter to ask permission. Twitter gives out a request token and a secret (cryptic string). The secret is
used by the user to verify they are coming from Catfinder.
The user is redirected to the Twitter to approve Catfinder.
The user gives permission to Twitter to let Catfinder post on the user's feed.
Catfinder requests an access token from Twitter. Twitter responds with an access token.
Catfinder posts to the users twitter.
Here’s the benefits, our hero (the user) never had to share their login credentials with Catfinder all he did was delegate access using Oauth. The user can login into Twitter and revoke permission from Catfinder any
time he’s no longer wants pictures of cats in his twitter feed.
Why did OAuth ruin my weekend?
Twitter no longer allows user to request data without setting up oauth. This can
be easily handled with a ruby gem or a wrapper if you are using node.js but if you are not using
a backend and just writing vanilla javascritp it is extremely difficult. Why is it so difficult?
The reason is that its very hard to make key and token strings hidden without a backend. A visitor to your
site can find a way to see them.
When you decide you want to access Twitter’s API they will give you the following information
that you will need to include as part of your API’s authentication.
Consumer Key
Consumer Secret
Request Token URL
Authorize URL
Access Token URL
Handing these off in the correct method and order can be difficult but are nicely abstracted out
in a number of different gems, wrappers and packages. Twitter provides a list of libraries:
https://dev.twitter.com/overview/api/twitter-libraries
Web sites are being served to a large number of different screen sizes and devices types. How do you design and develop a site that looks as nice and pretty on a tiny 4" phone as it doesn on a 25" monitor?
Before I started coding I worked as a project manager shepherding digital sites and content from the idea phase through the design and development cycles. Over the last few years, as the amount of screen sizes and devices grew, I used all kinds of buzzwords to get this point across to clients. Terms like ‘device agnostic' and ‘mobile first’ were flagrantly used many times a day.
From a strategy perspective it’s very clear to me why responsive sites are needed and why a site would want to serve up specific content based on the device and screen size that the user has in their hand. What I never understood was how it was actually being implemented by the developers.
I’ve had a chance to take a look at how content is delivered, or not delivered based on screen size. It turns out there are several different ways to approach responsive front end development, this blog post will tackle the basics of media query in CSS.
First off, let me define responsive web designs to make sure we are all on the same page.
Responsive web design:
From Wikipedia: “Responsive web design (RWD) is an approach to web design aimed at crafting sites to provide an optimal viewing and interaction experience—easy reading and navigation with a minimum of resizing, panning, and scrolling—across a wide range of devices (from desktop computer monitors to mobile phones)
A site designed with RWD adapts the layout to the viewing environment by using fluid, proportion-based grids,flexible images, and CSS3 media queries…“
An example:
A mobile phone has much less real estate and may load slower if it’s on broadband. When designing for a phone you are going to want to focus on essential functionality and remove images that may supply a rich interactive experience but are unnecessary. Also a user on a phone may be more likely to search based on locations so a designer/developer should optimize for this.
How do we build this? The answer is Media Queries
Media Queries are used in CSS to grab information from the browser and make decisions based on what comes back. It can procure info like browser width and height, device width and height, orientation (portrait or tablet), and resolution.
In your CSS file you can use a variable called @media to make decisions based on these parameters.
Here’s a basic template of how a media query should be set up in your CSS file:
123
@media (query) {
  /* CSS Rules used when query matches */
}
Here’s a working example. This is saying, that the CSS below should only be used on browser smaller than 480px. The wrapper is then set to 400px and a background image called ‘media-queries-phone.jpg’ is used. This image is probably proportionally correct for a phone.
Media queries can be compared to IF and ELSE statement. If the query is found true, i.e. the browser is larger than 480px, then the CSS in the block is acted upon. If the query is false then do not act on the CSS in the block.
What if there are more than one item that needs to be checked? For example, only use the CSS on tablets where the browser has a minimum width of 600px and maximum width of 800px. Here’s how that would loko:
123
@media (min-width: 600px) and (max-width: 800px) {
  html { background: red; }
}
If you’d like the queries to work like and OR statement then use a comma to separate your queries like below.
WTF? Rails is just generating a long string of letters and numbers and nobodies wondering what is going on?!? Are we being tracked? Are we being monitored by an alien race living on the dark side of the moon? How many more days until skynet? Is it a doomsday clock!?! Or is it just the government tracking everything we do?
Turns out this often misunderstood automatically generated piece of code is protecting us from cross site request forgery, a term that does not roll off the tongue, so just call it CSRF.
That doesn’t clear anything up. What is CSRF?
CSRF is a vulnerability that arises from the way that applications trust a browser’s sessions identification. During a CSRF attack, the attacker tricks a separate web application into executing actions. It can potentially trick the victim into submitting malicious actions. CSRF attacks cannot retrieve data but can change states.
Here’s an example, let’s say you are using a web site called, ‘ForgotTofeedMyCat.com.’ (FTFMYC) Meanwhile you have another browser tab open to ‘FishFoodFast.com’. You click on a picture of fish on FishFoodFast.com that has malicious code. This code utilizes that fact that you are logged into ForgotToFeedmyCat.com and sends a request to ForgotToFeedmyCat.com asking to delete your account including your 1,000,000 rewards points that you have spent years earning.
Luckily Rails 4 and above automatically protects you from the dreaded CSRF attack! Rails 3 has a cookie based solution which can still be attacked so upgrade to Rails 4 immediately. Rails 3 utilized cookies instead of the Rails session helper which left if vulnerable to CSRF attacks.
So how does Rails 4 and above do this magic?
The protect_from_forgery method! Protect_from_forgery is included by default in the application_controller.rb and it is automatically applied when generating new applications.
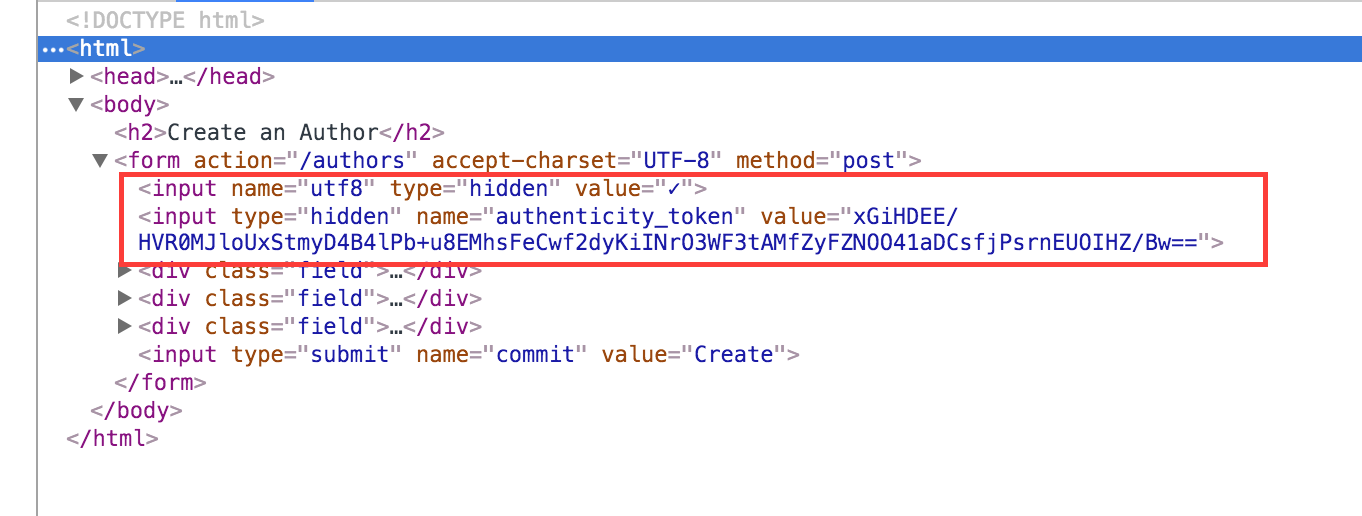
Here’s the high level on how it works. Rails leverages cryptographically random tokens. It places one token in the hidden field, this is the long string of numbers that we see if we inspect the page. It also places one in the user’s session. A user session is a piece of memory that maintains a small amount of data about the user. For example if a user put anything in their shopping cart this could potentially be in the session data.
Every time the server has an action it generates and sends a new token as part of it’s response to the browser. When a user responds they resend this token back to the server. If this doesn’t match the last one the server sent to you, your request gets aborted since it’s likely malicious.
This long string of numbers is secretly added as a hidden input field (aka authenticity_token) to every form.
And if you want to devise your own random token here’s the code that Rails uses. It’s located in lib/devise.rb
123
def self.friendly_token
  SecureRandom.base64(15).tr('+/=lIO0', 'pqrsxyz')
end
::base64 generates a random base64 string. That means there are 64 characters that are available to appear in each spot of the string. The number 15 sets the length of the random string as 15 characters long. Tr works kind of like gsub except its looking for characters instead of strings. Here’s an example:
The authentication_token is only applied to POST, PATCH and DELETE requests. GET requests do not have tokens since they don’t create, alter or destroy…. unlike our future robot masters!
Let’s talk about the GROUP BY and HAVING statements and how to best use them in SQL.
But first … ROTHKO!
Why Rothko? His work highlights the importance of carefully choosing the items that group together. By “grouping” specific colors the piece as a whole is stronger than the individual color. Grouping or picking the right items that go together can heighten or take away from a group. 1 + 1 = 3 or 1 + 1 = -2.
Further Proof on the importance of correctly grouping items
Same with food, eating a meal that has flavors that complement each other can bring the plate to the next level (salty and sweet is a killer… shout out to salted crack caramel ice cream).
1. Group By
What’s up with GROUP BY? Is it as straightforward as it sounds or is there some dark layer hiding underneath that will haunt your SQL statement and return you ‘american cheese’ when you were expecting ‘Gouda’. SQL acts like it’s as straight forward as vanilla but there’s got to be some chunky monkey hiding beneath the surface. (No more food jokes, I promise.)
Group By - Basics:
Lots of times we have more than one record for a certain attribute. For example, there could be 25 players on the Yankees in a league with hundreds of players. What if I just want to know how many home runs the Yankees' hit?
OR what if need to know the total sick days for 5 members of the custodial staff in a company of 100 employees?
OR what if I’m trying to see the average age of the current members of Parliament Funkadelic and my database has info on everyone who has ever played in the group?
GROUP BY is the key to finding out this kind of critical information in a SQL database.
GROUP BY gathers all of the rows together that contain data in the specified column and will allow aggregate functions to happen to one or more columns.
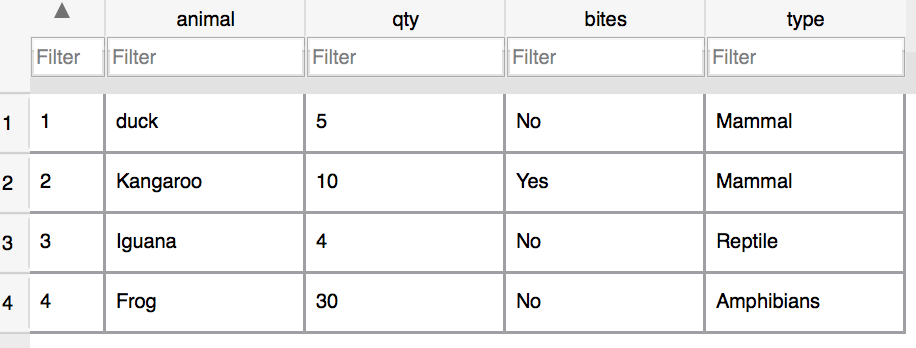
Let’s say you are in charge of a zoo. Let’s call it the Flatiron Zoo for Discarded Animals. To keep better records you put together a nice SQL database that looks like this:
Let’s say I’d like to see how many Mammals I have at my small zoo. I’d want to have a row just for animal types. That’s where GROUP BY can come in handy. I can SUM the items in my select and only show one row of Animal Type.
I’d execute this SELECT to see how many of each animal type there is.
12
SELECT type, SUM(QTY) FROM animals
GROUP BY type
Be Aware, be very aware:
There must be some common missteps that people make, right?
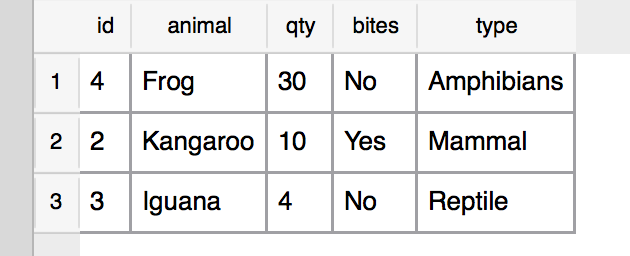
Let’s say you run this SQL statement:
12
SELECT * FROM animals
GROUP BY type
You would get a highly dubious table that looks something like this:
It probably wouldn’t be much help since it’s basically just given us one row for each animal type.
2. HAVING
So what’s the deal with using HAVING? I know it replaces WHERE sometimes but what’s the rule… when should I be using it?
RULE #1: WHERE does not work with aggregates. For example:
12
SELECT animal_type, sum(Qty) from Animals_in_zoo
GROUP BY animal_type WHERE sum(qty) > 10
This does not work. You need a HAVING instead of WHERE if there's an aggregate involved. It should look like this:
12
SELECT animal_type, sum(Qty) from Animals_in_zoo
GROUP BY animal_type HAVING sum(qty) > 10</li>
RULE #2: One of the SELECT items has an AS after it.
SELECT animal_type, animal AS animalize from Animals_in_zoo
GROUP BY animal_type HAVING animalize = 'Duck'
Before last week I was convinced that at a fundamental level everything could be built of some combination of an if, else and while loop. I ignored higher level enumerators at all cost. As soon as I saw Ruby’s inject method I instinctively tried to avoid it. It seemed confusing and unnecessary. Maybe there were some “advanced” coders who used it but I’m sure I could get around ever needing it.
At some point during last week’s lab I was prodded into using it and very quickly the learning curve disappeared and it became a go-to tool.
Enumerable#inject is a powerful shortcut, it’s makes summing up items simple and compact.
The basics of inject can be done without .inject but it’s really clunky. For example:
1234567
counter = 5
sum = 0
while counter <= 10
  sum += 5
  counter += 1
end
return sum
Inject is an iterating device lets you pass in a variable that can then be acted upon by all the items that are iterated through. Think of it like a class variable that stays throughout the laps of iteration. Inject then returns the variable which can be the sum of all the laps of iteration.
A basic example would work like this:
1234
[2,3,4].inject() do | accumulator, item|
  accumulator += item
end
#=> 9
Every item in the range is passed into the inject method. The block is executed one for each element that the inject is called up. In this case the range array has the numbers 2,3 and 4. The block will be executed upon 3 times. The first time the variable ‘item’ will be ‘2’, the second time ‘3’ and the third ‘4’. In each execution the ‘item’ will be added to the ‘accumulator’ variable. Inject is an easy way to sum up all the items in the array!
Inject can also be passed a variable so that your ‘accumulator’ doesn’t need to to start at 0. Take a look at this example.
1234
[2,3,4].inject(20) do | accumulator, item|
  accumulator += item
end
#=> 29
The ‘accumulator’ variable is going to start at 20. This information is set directly to the right of the inject method.
Inject is now my go to code of choice when summing up items is needed.